Last fall, Microsoft announced forthcoming capabilities to take a picture of a data set using your Android-based or iOS-based device and import that data in Excel. That feature has now been fully rolled-out to both the Android and iOS platforms. In this tip, you will see just how easy it can be to get data into Excel by simply snapping a picture.
A Prerequisite - You Must Use the App!
To take advantage of this feature, you must use the Excel app for your mobile device. Fortunately, if have not already acquired the app, you simply visit your app store to access and download the tool. Of course, if you are using an Android device, you can find the app in Google Play; if you’re running an iPhone or iPad, visit the iTunes App Store from your mobile device. Keep in mind that the Excel app is free, although you will have an enhanced set of features and functions if you also have an Office 365 subscription.
Importing Your Data into Excel is Easy!
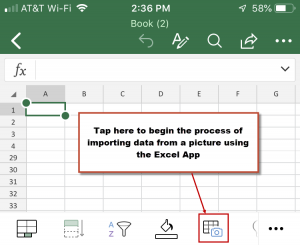
To import data into the Excel app, begin by opening a blank workbook in the app. Then, just tap the Insert Data from Picture button highlighted in Figure 1 to open the camera on your device.
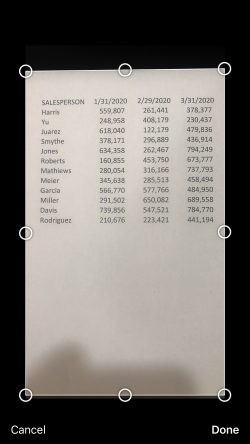
Using the camera, take a picture of your data, trying to focus as tightly on the data range as is possible. An illustration of the initial image taken by the camera is provided in Figure 2.
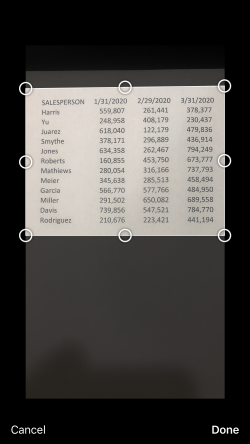
Next, crop the picture as tightly as possible by dragging the circles surrounding the image. The more closely you can crop the picture, the more accurate your data conversion will be and Figure 3 provides a sample of the cropped data.
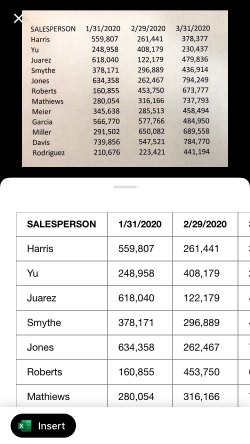
Immediately prior to converting the data into Excel, the app provides you with a preview that compares the initial image to how the data will appear in Excel. An example of this image is shown in Figure 4. To complete the process, just tap the Insert button in the lower, left corner of the app, as shown in Figure 4.
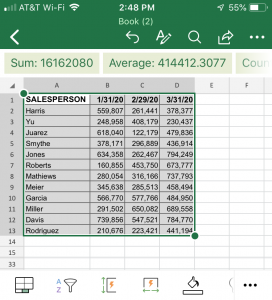
Finally, as you can see in Figure 5, Excel inserts the data into the spreadsheet. Once inserted, you can work with the data just as if you had manually entered it into the app. Of course, if you have a OneDrive, OneDrive for Business, or SharePoint Online account and you save the workbook there, you can then open the workbook – inclusive of the imported data – using your desktop version of Excel.
Summary
As you can see, importing data from a picture into Excel is rather easy – just snap a picture of the data using the Excel app on your smartphone, crop the image, and Excel will do the rest of the work for you. This is but one way that Microsoft is easing the process of getting data into your workbooks. Others to consider are the Stock and Geography data types added to Excel 2019 and Power Query. We encourage you to stay on top of new features such as these so that you can work as efficiently as possible in Excel.
You can learn more about this and many other new features in Excel by participating in a K2 Enterprises Technology Conference. For more information, just click the button below.